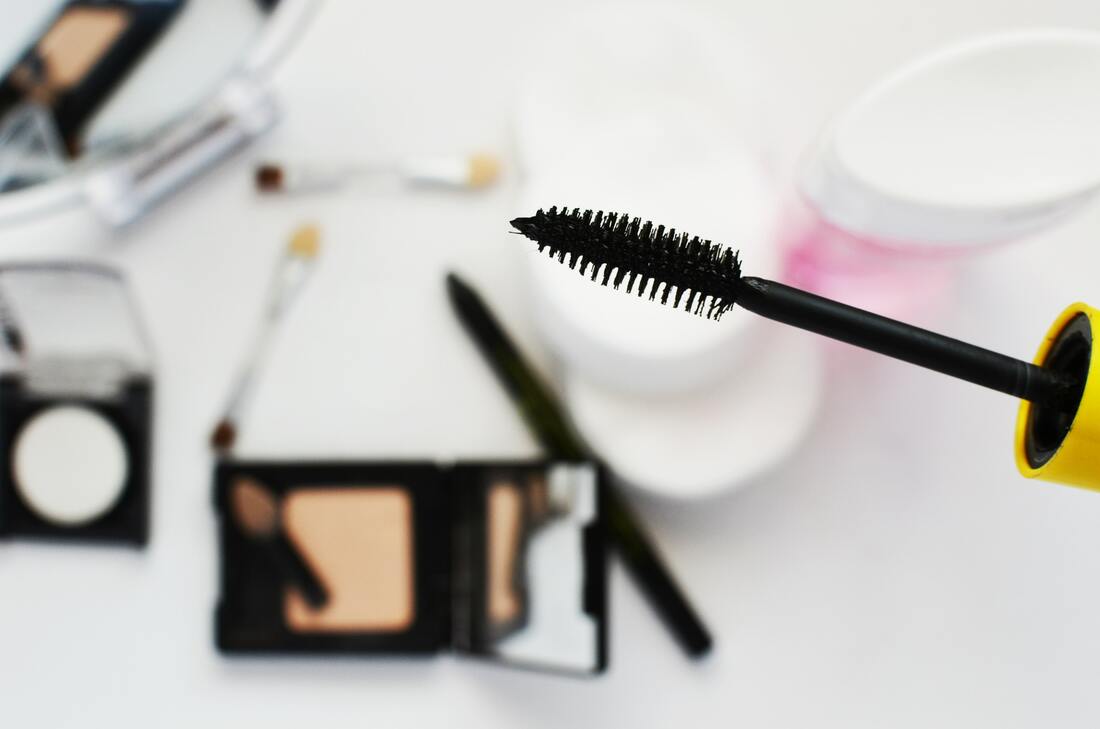
6 Beauty Products That Truly Work
As an Ulta Beauty Club Member and a Sephora Insider, I'm all about getting a good bargain to support my cosmetics addiction. However, over the years, I have found that some products truly are worth the extra money.
I've tried dozens of lotions, potions, serums, and products. Below, check out the five beauty products I've tried and loved. These are the products I feel are actually worth splurging a bit for. 1. Dry Bar Charcoal Shampoo
I gave Dry Bar a try last year. I was skeptical; the hefty price tag made me hesitant. However, the results made me a believer.
This is actually the line of hair products that will change your bad hair days. Truly. I am a huge fan of all of their products, but the charcoal shampoo is my favorite. It is super cleansing and helps get rid of all of the build-up products in your hair. This one is great, too, because you can use it once a week, which makes the price tag worth it. You can give the Dry Bar On the Rocks Charcoal Shampoo a try for $10 for the trial size and see if you're a fan, too. 2. Drunk Elephant Products
I have been looking for moisturizers and serums to take away my fine lines, big pores, and patchy/oily skin for years. I hate to even think about how much I've spent in the search for the elusive cream to change my skin.
Stop spending money, do yourself a favor, and invest in Drunk Elephant. I love that this brand is all-natural and cruelty-free (something I'm very passionate about). More than that, I love that the products work. I've been using the day and night sampler kits as well as the cleanser and Peptide cream. It's been a month, and I've seen a dramatic change in my skin. Seriously. It's smoother, the wrinkles are fading, and I feel like I need to wear less makeup. I recommend starting with the day and night sample kits ($23-27). They've lasted me over a month, and it's a great way to see what you think without the commitment. Head over to the Drunk Elephant website, or head to Sephora, who also carries the kits. 3. Shape Tape Concealer and Foundation
I tried the sample of the Shape Tape concealer and was super impressed. My dark circles disappeared in a second.
I was so impressed, that I bought the Shape Tape moisturizing foundation. It offers full coverage without the cakey feel I hate in a liquid foundation. I got my foundation on sale at Ulta for $19, but I still feel like it would be worth the $39 price tag. It has become my favorite foundation (and again, I've tried a ton, from Younique to Bare Minerals to Born This Way, you name it). Head over to Ulta to find out more. 4. Kenra Brightening Shampoo
I am a brunette with bright blonde highlights. I hate how halfway to my salon appointment, my highlights have faded a bit and just don't pop.
Enter Kenra's Brightening Shampoo. The violet base magically transforms your blonde back to the bombshell color you want after just one wash. Seriously. I didn't believe it at first either...but in one wash, I saw results. If you use it a few days in a row, you'll see a dramatic change. At $26 for a full-size bottle, it's really not too much of a splurge, either. I use it about once or twice a week to brighten up my locks. Check it out at Ulta, or wait for one of their Liter sales and stock up. 5. Urban Decay Eye Shadow
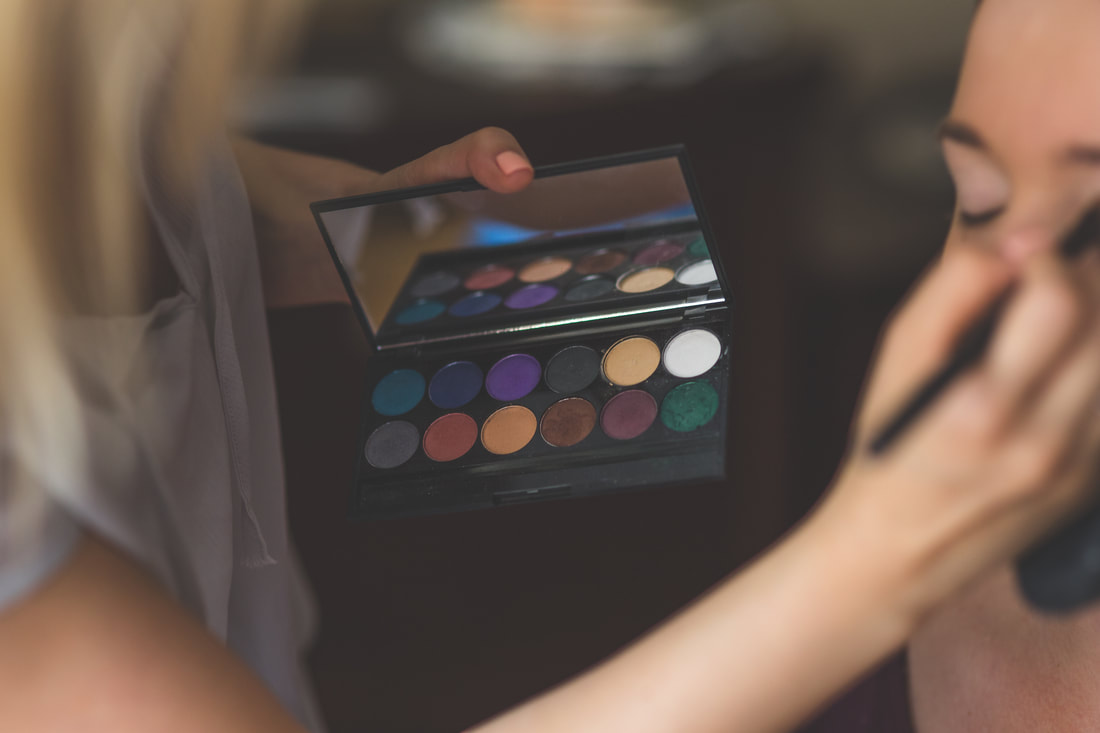
I'm an Urban Decay eye shadow snob. Ever since my first Naked Palette, I haven't gone back.
Their colors are gorgeous and super blendable. They help you get that perfect, runway worthy eye look without a lot of skill. Sometimes when I'm in a hurry, I'll wear just one color...and I still get compliments. My favorite palette lately is the Heavy Metals palette I got for Christmas. It's got a side for day and a bold side for night. Make a statement. Life's too short for boring eye shadow. 6. It Cosmetics Brushes (especially eye shadow)
I used to think brushes were a waste of money. Until I started watching Youtube beauty experts like Christen Dominique and realized brushes are everything.
If you don't have a high-quality blending brush, I would say this should be your first investment. It ups your eye shadow game tenfold with just one brush. I love the It cosmetics brushes....I have a whole set I got on sale. The quality and the airbrush look it gives you is stellar. Check out the brushes here, and then tell me in the comments what your favorite brush brand is.
Lindsay Detwiler is a romance author with Hot Tree Publishing and a thriller author with Avon Books/HarperCollins UK. To learn more about her work, beauty tips, and more, visit her on Facebook.
0 Comments
April's Petit Vour Unboxing: Cruelty-Free Beauty
I'm a huge animal lover and an advocate for cruelty-free beauty. I love my makeup products, but I also do not want any animals suffering for them.
Thus, the Petit Vour beauty box is a perfect subscription box to give me the best of both worlds. This box is $18 shipped each month and comes with four products, all of which are Vegan and cruelty-free. The sizes are great, the products are high-quality, and I am in love with getting a beauty gift in the mail every month. Check out my video to see what's inside the April box, and comment below with any cruelty-free beauty boxes or products you think I should try next! 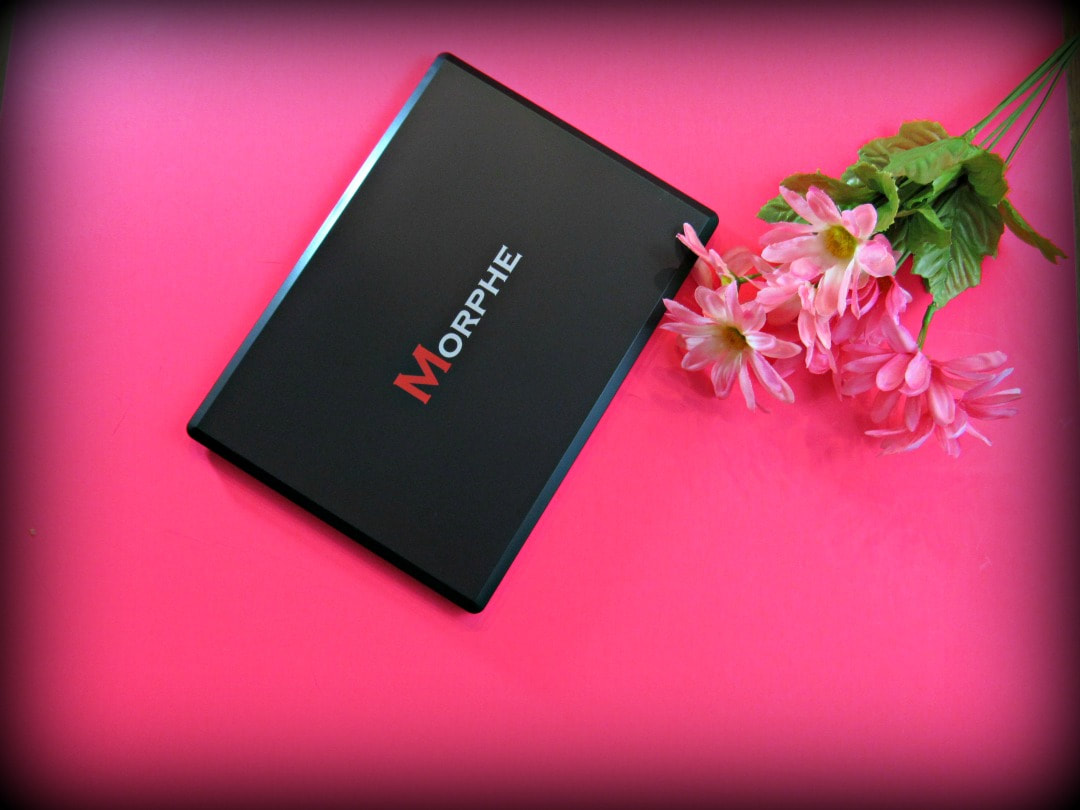
Beauty Haul Morphe Palette Review
I've always been an Urban Decay girl when it comes to eyeshadow. I thought there was no way anything would ever compare.
However, one of my students (I'm a high school English teacher) always has eyeshadow that is just on point. She told me about Morphe palettes and because her eyeshadow was just rocking it, I decided to give it a try. I was amazed that this huge palette was only $23! Way cheaper than the $55 I drop for a much smaller Urban palette. Still, I was super skeptical. Could it really hold up? I love the sleek design of this palette. It is so thin and could easily slide into any bag. Plus one from the beginning. I also love that the shades are so varied yet also so close. There are many nuances of the same shades, allowing for perfect blending and layering. It's easy for even a beginner to create those beautiful, smooth looking gradients using this eyeshadow thanks to the colors included. I went with the Fall Into Frost palette after a lot of deliberation (There are soooo many color options, another plus!). I'm a shimmer girl, and I've been pleased with the frosty look. It's a modern frost, unlike some of the 1980's shades of nightmares. Like Urban (and perhaps even more), these shadows are super pigmented, so a little goes a long way. They go on with a high density but are also easy to blend. Overall, I'm in love with this brand. Will I still use my Urban shades? Yes. They are the first shadows that made me feel confident in my shadow skills. Plus, some of my favorite colors are in there. Still, I'm so happy to have found another shadow I love with fun colors and so many options to mix it up. Have you tried Morphe shadows yet? what's your favorite palette? Let me know in the comments! 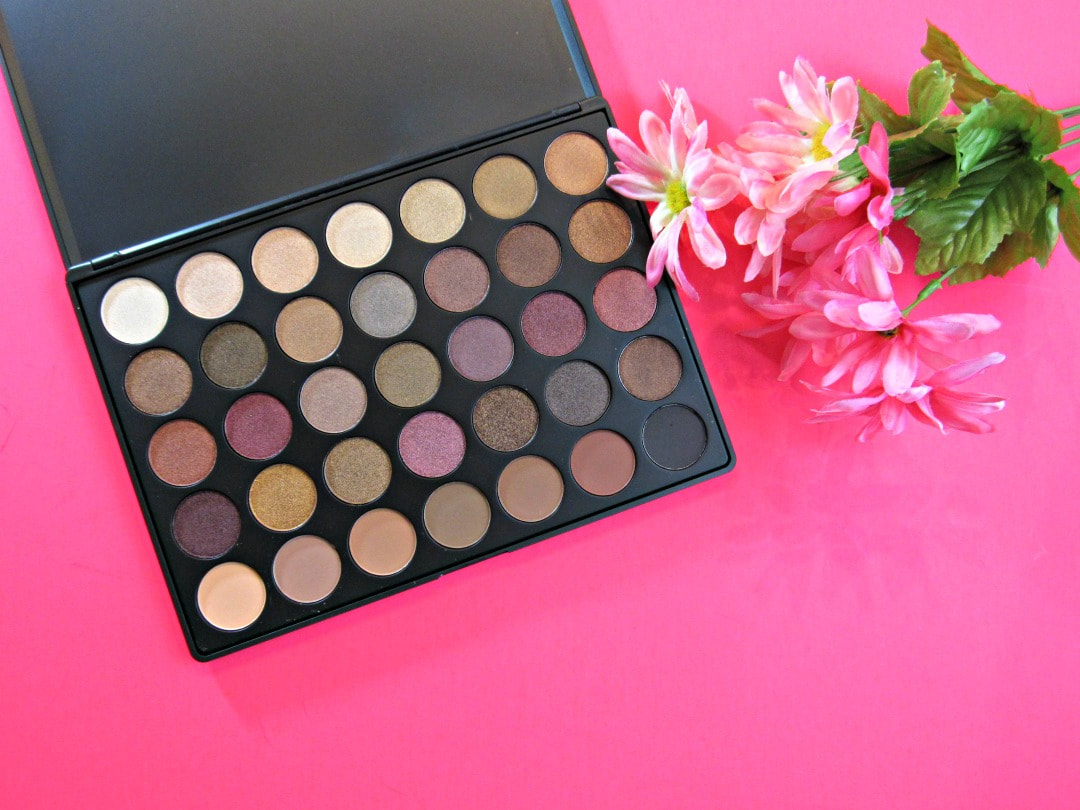

5 Easy Beauty Tips You Need To Know Now1. Let your foundation dry before using setting powder.
This was a true game-changer for me.
If you use liquid foundation, you need to let it dry before setting it with powder--and yes, you really should set it. In the past, I would do one of two things: 1. Slap on only liquid foundation and then be on my way 2. Slap on liquid foundation and immediately coat it with powder Both of these techniques leave your foundation lackluster later in the day. Setting it with a translucent powder helps it stay all day. However, if you put powder on it too quickly, it will leave a cakey layer that just accents your pores. I put on my foundation first (with a blending sponge) and then let it dry while I do my hair and other makeup. After about ten minutes, I'll lightly dust over it with translucent powder (I use NYX setting powder). My foundation lasts all day and doesn't get cakey. For an added glow, I'll add a quick dusting of Urban Decay Illuminated Powder to give me some life. 2. Blend your contour up.
I'll be honest... contouring is not my strong suit. Still, the best tip I learned was to blend your contour on your cheekbones up toward your hairline. It makes it look more natural and prevents it from coming down too far on your cheekbones. If your contour line comes down to close to your nose, it makes you look skeletal.
3. Brushes really, truly matter. Invest in high-quality.
I used to cheap out on my brushes. Would a $20 brush really work any better than a $3 one? I didn't think so.
But then I realized that without the right tools, any products you are buying are just a waste. Why invest in high-end cosmetics only to cheap out on tools? I have been using It Cosmetics brushes now for over a year and have seen a drastic improvement in my makeup. They help eye shadow, blush, and even foundation from going on too heavy. If you want that airbrushed quality, high-end brushes are a must. You don't have to pay an arm and a leg for a set, either. I got my It cosmetics brushes on special at Ulta. Watch for sales on the sets, and you'll be ready to bring your makeup to its A-game. If you want to give it a try, here's a travel set of It Cosmetic brushes to get you started for only $30. 4. Use a base color for your eye shadow.
Choose a bone color eye shadow as a base layer. This helps with blending and prevents harsh lines. It's almost like priming a canvas in painting. Your eye shadows need something to blend with in order to create that seamless look.
5. Hold your brushes near the end for better blending.
This is a tip that came from the Youtubers. When there's so much to learn and think about with your makeup technique, how you hold the brush seems to be the least of your worries. However, where you hold the brush can totally affect your blending game. For seamless eye shadow blending, hold your brush near the end of the handle and use light pressure. This keeps it from getting streaky/ having hard lines.
Need more tips? Want more advice? I recommend checking out Christen Dominique's Youtube channel. She's got amazing advice and her beauty routine is always flawless. I love it, however, because she's super good at breaking it down for the average woman. You don't have to be a beauty expert to master her techniques.
Beauty Products Actually Worth Your Hard-Earned Cash
Yes, I'm a beauty and hair product addict. I've earned my Ulta VIP status and then some. I've racked up Sephora points like it's my job. I've collected countless lotions and potions in the hopes of finding the miracle product that was going to tame, defrizz, smooth, unwrinkle, define, improve, and everything else the beauty world promises.
I've spent way too much money--and I've been way disappointed so many times. However, with my trial and error, I can say I've found quite a few products over the years that are actually, truly worth your time. Here are my top 5 products worth the price tag. 1. Dry Bar Shampoo and Conditioner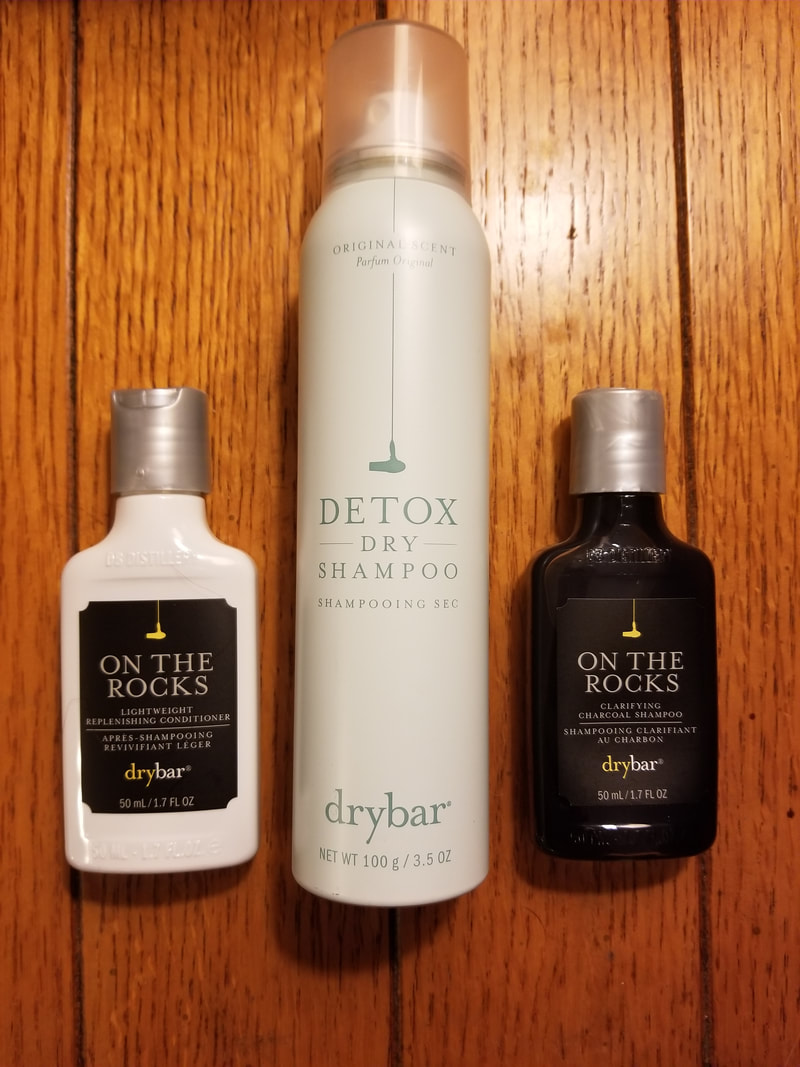
Sephora sent me a sample of Dry Bar Sake Bomb Shampoo and Conditioner... and my wallet was forever ruined.
This shampoo and conditioner is pretty expensive... but it's the only shampoo/conditioner combo I would actually classify as life-changing. I'm always looking for that perfect shampoo to take my hair up a few levels, and this one does it. After one wash, my hair was noticeably softer and easier to style. I recently got theDry Bar Charcoal Shampoo and Conditioner kit from Sephora. It is equally as life-changing. The dry shampoo is also on its own level. I definitely recommend any of these products... it's worth the dent in your pocket, trust me. 2. Tarte Rainforest By the Sea Foundation
I found this miracle foundation from Christen Dominque's Youtube channel. This water-based foundation is like none-other. It essentially melts into your skin but still gives you adequate coverage. It is by far my favorite foundation of all time... and I've tried a few dozen.
3. It Cosmetics Brushes
I used to think all brushes were the same and, thus, the cheaper the brush, the better. I went for quantity over quality.
And then I triedIt Cosmetics' eye shadow blending brush. My eye shadow game went up a couple of notches. I invested in a set of brushes from Ulta and realized the brush really does make the face. I have a set that includes the foundation brush, powder brush, concealer brush, and two eye shadow brushes. They are worth the money because they truly make every step of your makeup look more natural. 4. Hot Tools Curling Iron (24k gold)
Again, I was always convinced curling irons were all the same. I was using the cheapest curling iron possible and couldn't figure out why my curls were falling flat by noon.
I finally invested in a Hot Tools gold-plated curling iron. Now, my curls seriously last over a day without any extra steps. 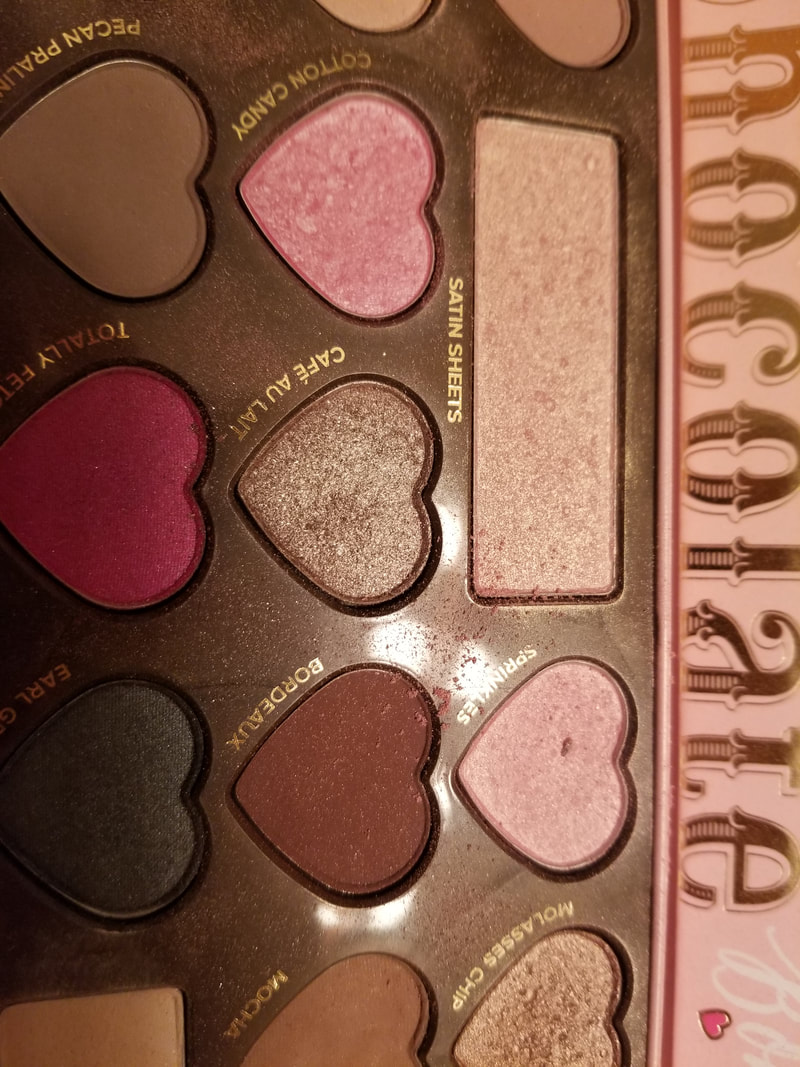
5. Too Faced Chocolate Palettes
I'm an Urban Decay eye shadow fan, but when my mom bought me the Too Faced Chocolate palette, I fell in love. When you don't have time for ten steps of eye shadow application, this palette is perfect because you can swipe on a single color and be ready for the day. Each shade is perfectly shimmery and pretty by itself. They are super blendable and smell amazing. I love this set of eye shadows for my everyday wear, and they are easy for beginners. You don't have to be a blending pro to get these super smooth shadows to look angelically pretty.
What would you add to the list? Comment below with your suggestions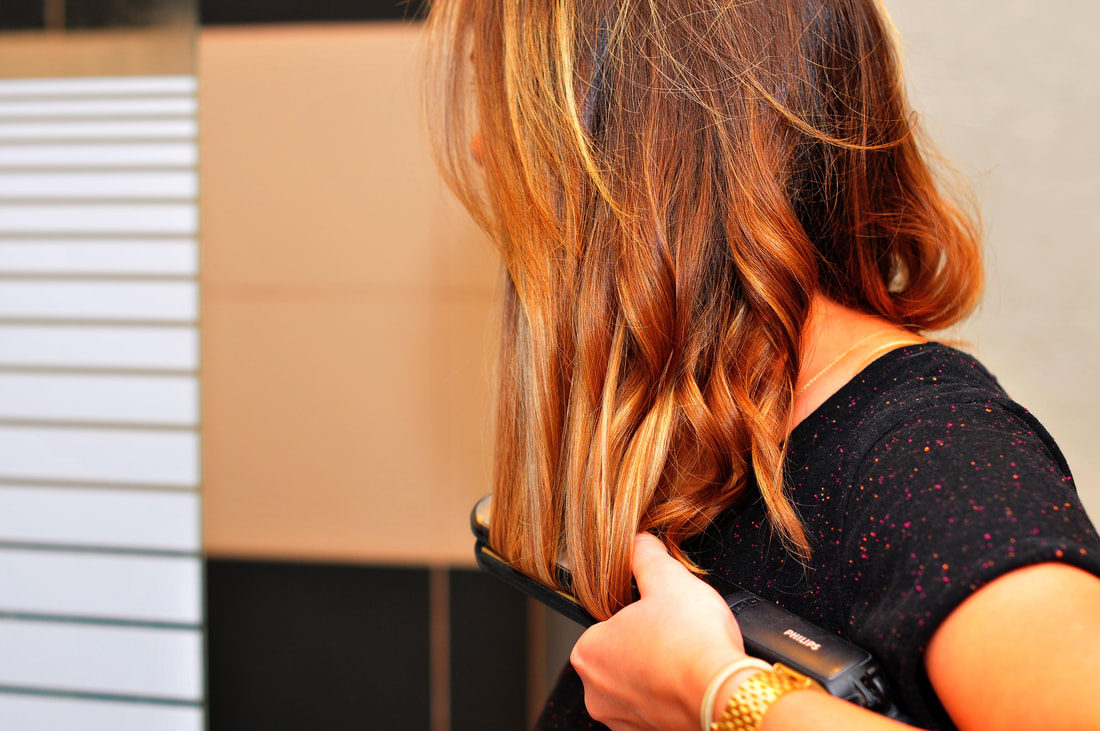 Books are my first love...but makeup and beauty products are a close second.
Check out this amazing review guide by Reviews.com. It will save you time and your hard-earned cash when you're in the market for a new curling iron. Feel free to share with any of your beauty loving friends.
I'm a bookworm, but I'm also a beauty addict. I've spent tons of cash over the years at Ulta, Sephora, Target, and all sorts of places looking for the best beauty products for the average woman. I believe in cruelty-free cosmetics as well. Every Tuesday, I bring you quick information about a beauty product I've tried and loved. Feel free to comment below with products you think I should try out. I'm always on the hunt for the next best product :)
Yes, You Need to Subscribe to Christen Dominque
As a beauty addict, I'm always trying to improve my sad technique. I'm no expert at makeup and don't claim to be. I need all the help I can get. You can buy great products, but if you don't know what to do with them, what's the point?
That's where Christen Dominique comes in. Her Youtube channel has completely transformed by beauty routine. I've picked up so many tiny tips and tricks from her that have made a huge difference in my confidence in my makeup. Her videos show you the power of makeup. I love some of her five-minute face videos, too, because they feel achievable for women of average makeup skills. Check out her channel! She is beautiful, entertaining, and so dang good at makeup! She also gives honest beauty critiques of products, which I love.
I'm a bookworm, but I'm also a beauty addict. I've spent tons of cash over the years at Ulta, Sephora, Target, and all sorts of places looking for the best beauty products for the average woman. I believe in cruelty-free cosmetics as well. Every Tuesday, I bring you quick information about a beauty product I've tried and loved. Feel free to comment below with products you think I should try out. I'm always on the hunt for the next best product :)
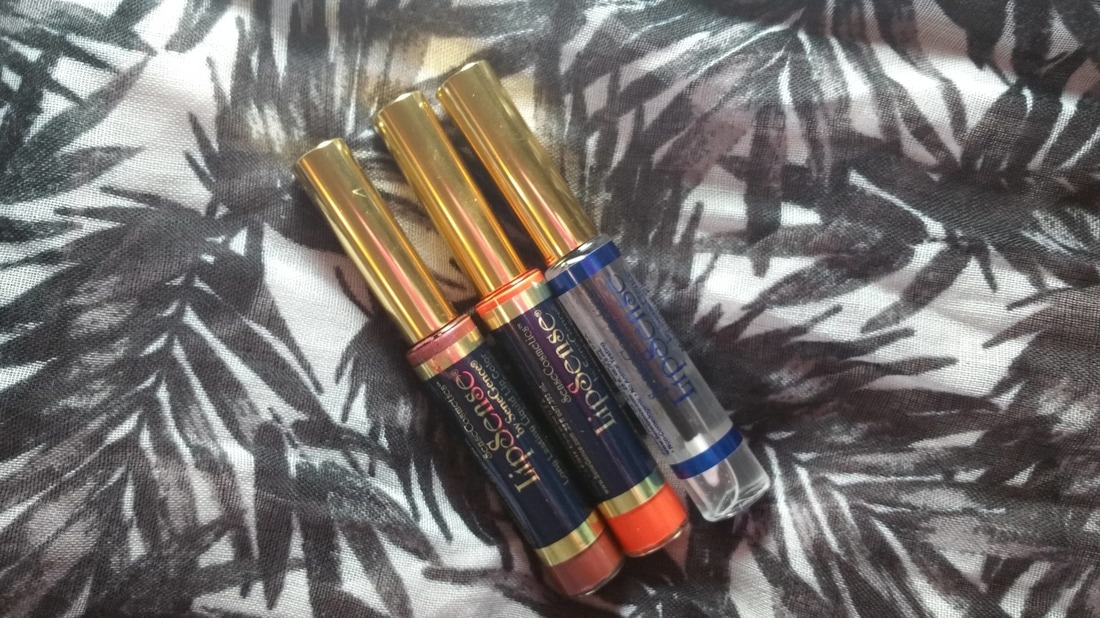
Lipsense Review
Okay, I know what you're thinking...
So 1st, no, I am in no way sponsored by Lipsense or have any financial benefits from sales. At all. And 2, it is not a gimmick. Seriously. When I first saw Lipsense, I thought, "Here we go. Another FB group sales nightmare. There's no WAY that stuff can work." And then I bought some...and guess what? It freaking works. Seriously!!!! Lipsense is made to last between 4-18 hours. You layer on three thin layers of the lip color, put on some gloss, and voila! Done. I get closer to 18 hours out of my Lipsense. Seriously. And at the end of the day...it hasn't budged. I will drink three cups of coffee, eat lunch and dinner and a million snacks...and it's still there. You are supposed to reapply the gloss throughout the day, but I'm way too lazy for that. But it still stays on! This product works better over time. There is an exfoliating process ( I know, it sounds weird and you're skeptical, but trust me on this one). For the first week or so, your lips will sort of peel, the product won't really stay on that long, and you'll think you got ripped off. And then, week two, once all the junk you've been putting on your lips is gone, it happens. You'll start getting all-day wear. I have two colors right now with a third on the way. My favorite color is coral. It looks freaking scary in the tube, but actually it's perfect on. Below is a pic of me wearing the coral color. It is a little pricey to get started. The starter kit is around $55. That comes with a color, gloss, and color remover in case you make a mistake. However, I've dropped $20-30 on a regular lipstick that I have to reapply constantly. Once you get started, you can just buy colors for around $29 with shipping. Seriously give this stuff a whirl. I've tried probably a hundred lipsticks looking for color that I love. I finally found it. Oh, and it's cruelty-free, which is super important to me. You can find sellers online, but I go through Deborah Biter. She's super helpful with color choices and is not pushy at all. Like at all, seriously. Here is her group link if you want to check it out. Have you tried Lipsense? Do you have a different favorite lipstick? Let me know below! 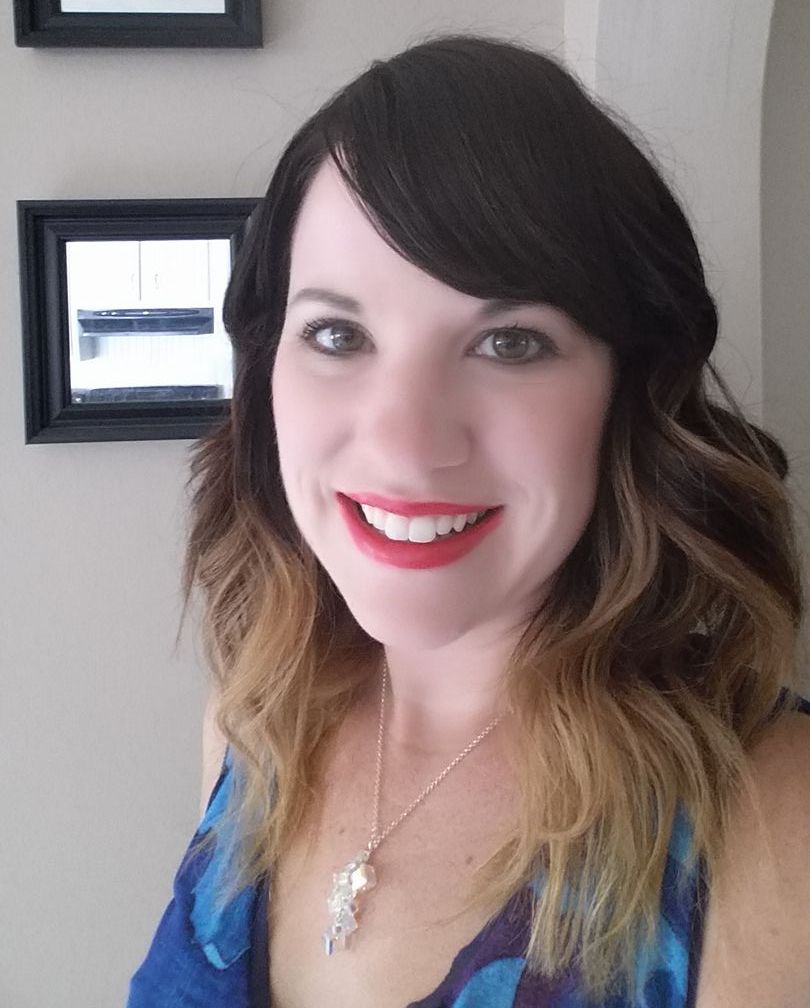
The cruelty-free March Beauty Box by Petit Vour, $15
Cruelty-Free Beauty: Petty Vour March BoxWhy I Love Petit Vour
A few years ago, I saw a video that changed everything in my beauty junkie ways.
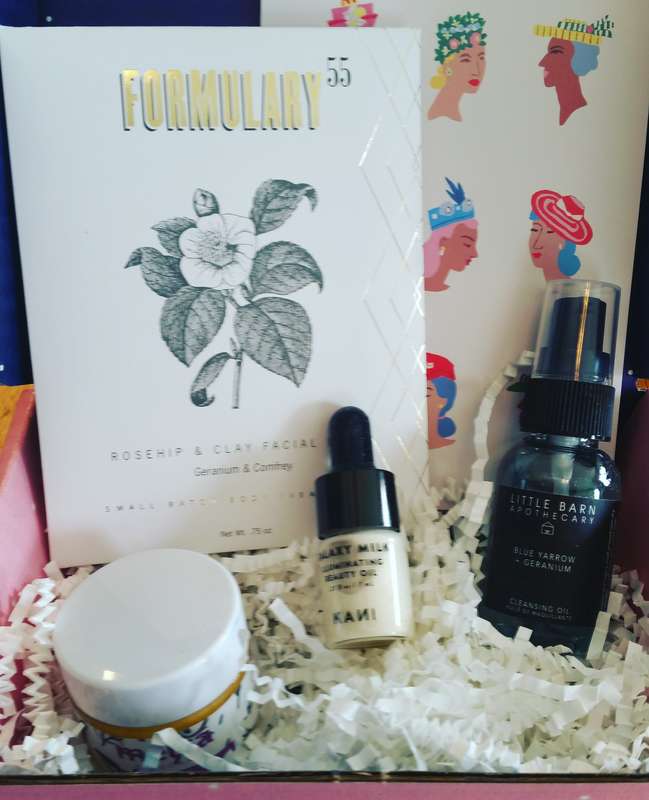
A Beagle Freedom Project video popped up on my Facebook, and I never looked at makeup the same way. After seeing the torture these animals go through during animal testing, I vowed never to let an animal suffer just so I could have pretty blush or nice, blending eyeshadow. When I first made the choice to go cruelty-free with cosmetics, things weren't easy. High quality products were few and far between. It was truly a sacrifice. Even things like the makeup box subscriptions were off the table since they included many products that tested on animals or included ingredients tested on animals. Then I came across Petit Vour. This cruelty free company mails a monthly subscription box with four items each month. Every item is 100% cruelty free and also vegan. These all natural products range from makeup to skincare to hair care. Even the sample sizes are decently sized, but sometimes you even get full-size products. I've been a member of this program for over a year now. For $15 a month (which includes shipping), it's great to try new products and get a fun surprise in the mail each month. What's in the March Box
This month, the box includes:
My review of the box
This month was mostly skin care products, which is what I really like to try from Petit Vour. I have used items from Little Barn Apothecary and am excited for the cleansing oil. I like that it says it tones and hydrates in addition to cleansing. I'm also a huge fan of masks, so I'm excited to pop that on (impromptu spa day, anyone?).
The face balm definitely looks like something to wear at night only and even suggests that on the directions. It looks a little heavy, so I do worry about clogging pores. It is formulated with rare East African shea butter, though, which sounds like it would be super hydrating. My skin is coming off of the harsh winter months, so it probably could use something like this right now. The only negative thing I have to say is that I'm worried about the illuminating beauty oil. I tried a bit on today and feel like it makes my nose look greasy instead of dewy. I'm also super not confident in my contouring/highlighting abilities, so I'm not sure if I trust myself with this. It has high amounts of glitter that do fade into your skin once the oil is absorbed, but I just have this inward fear of looking like a disco diva and no one telling me. So I'll come back and give more feedback once I've tried the items, but so far it looks like a nice box as far as skin goes. Check back next month to see what April's box is or head to Petit Vour for your box now!  I'm a beauty junkie, so I'm always trying new products. This holiday season, I got quite a few beauty gifts...from others, and from myself. Here are four products I'm loving right now. Bonus**Henry also approves 1. Pur Minerals 4-in-1 Liquid FoundationI got this at a super bargain price right before Christmas. I have a really hard time finding a foundation I love. I have super pale skin, so many fair formulas look orange on me. This one blends in perfectly and offers the perfect, medium coverage. 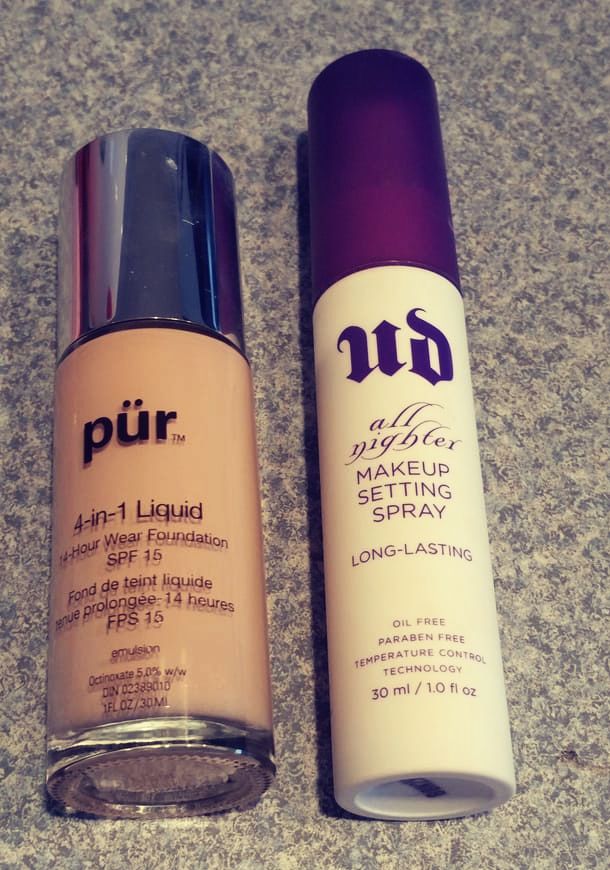 2. Urban Decay Setting SprayI had heard great reviews about this but was terrified to spray this on my face. I pictured dripping mascara and smeared, chunky powder. It actually really works. My makeup doesn't budge all day, and it doesn't smear any of my makeup. 3. Bare Minerals Vanilla Sugar RadianceThis came in a mini try-it kit. I adore this all over highlighter. It just adds a touch of radiance to my skin without looking like I stepped out of the glittery 90s. 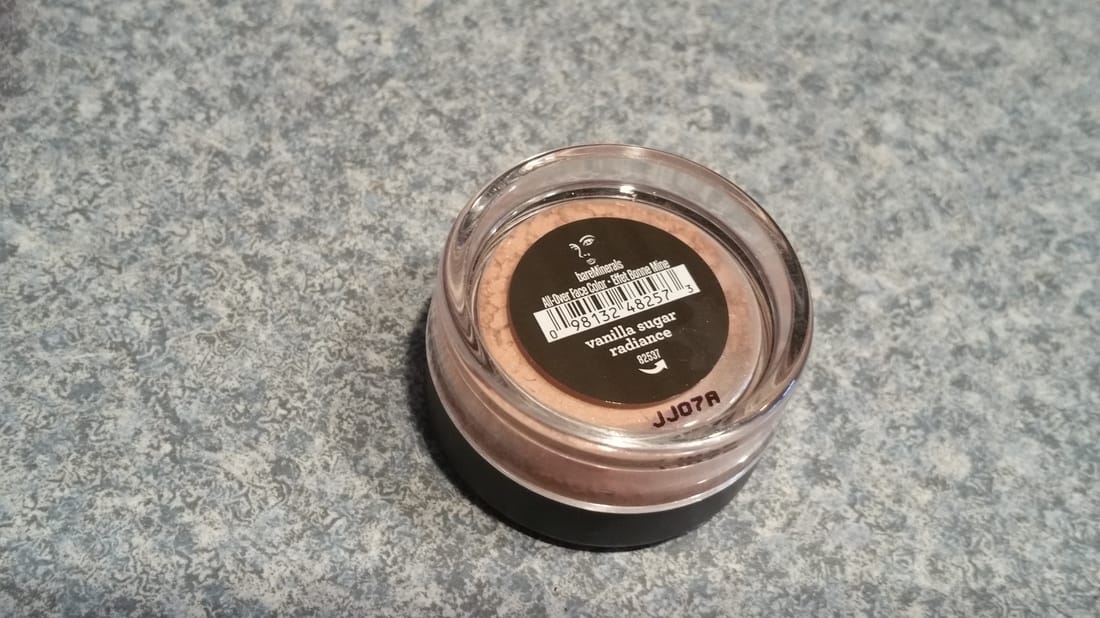 4. Too Faced Chocolate Bon Bons Eyeshadow PaletteI'm an Urban Decay eyeshadow girl through and through. I swore I'd never use another eyeshadow. But when my mom got this for me for Christmas, I became a believer in Too Faced! These eyeshadows are perfect colors for my fair skin and so blendable! They really work well together to bring out your eyes. It's super easy to mix and match shades, and I think any combination works. If you struggle with picking out shades to use from a huge palette, this one is perfect because as I said, they all complement each other!  How about you? What are your beauty faves right now? Leave a comment and share your beauty must haves!
|

*As an Amazon Affiliate, I get a small fee for any books purchased through the links below.


Archives
May 2024
Categories
All
|
 RSS Feed